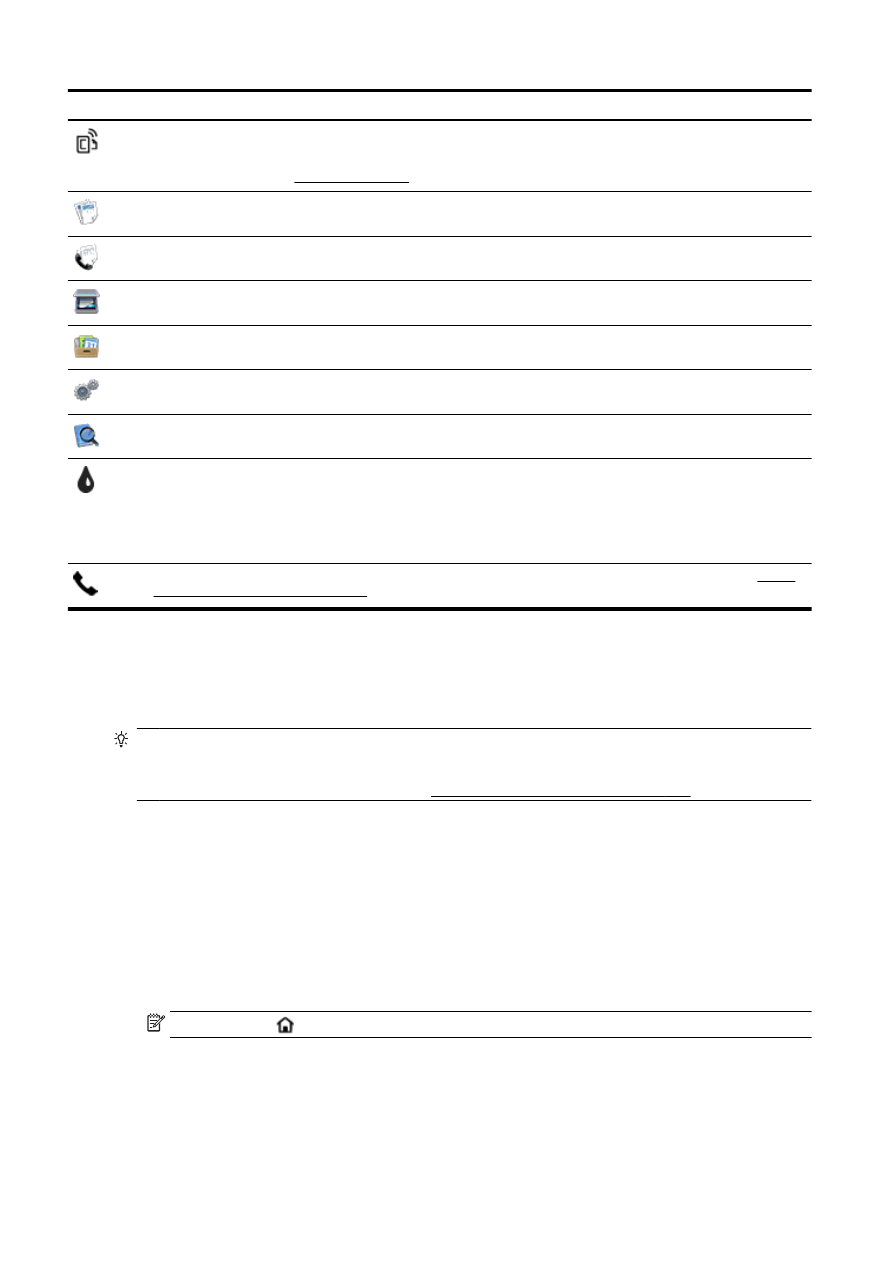
Control panel display icons
●
Change printer settings
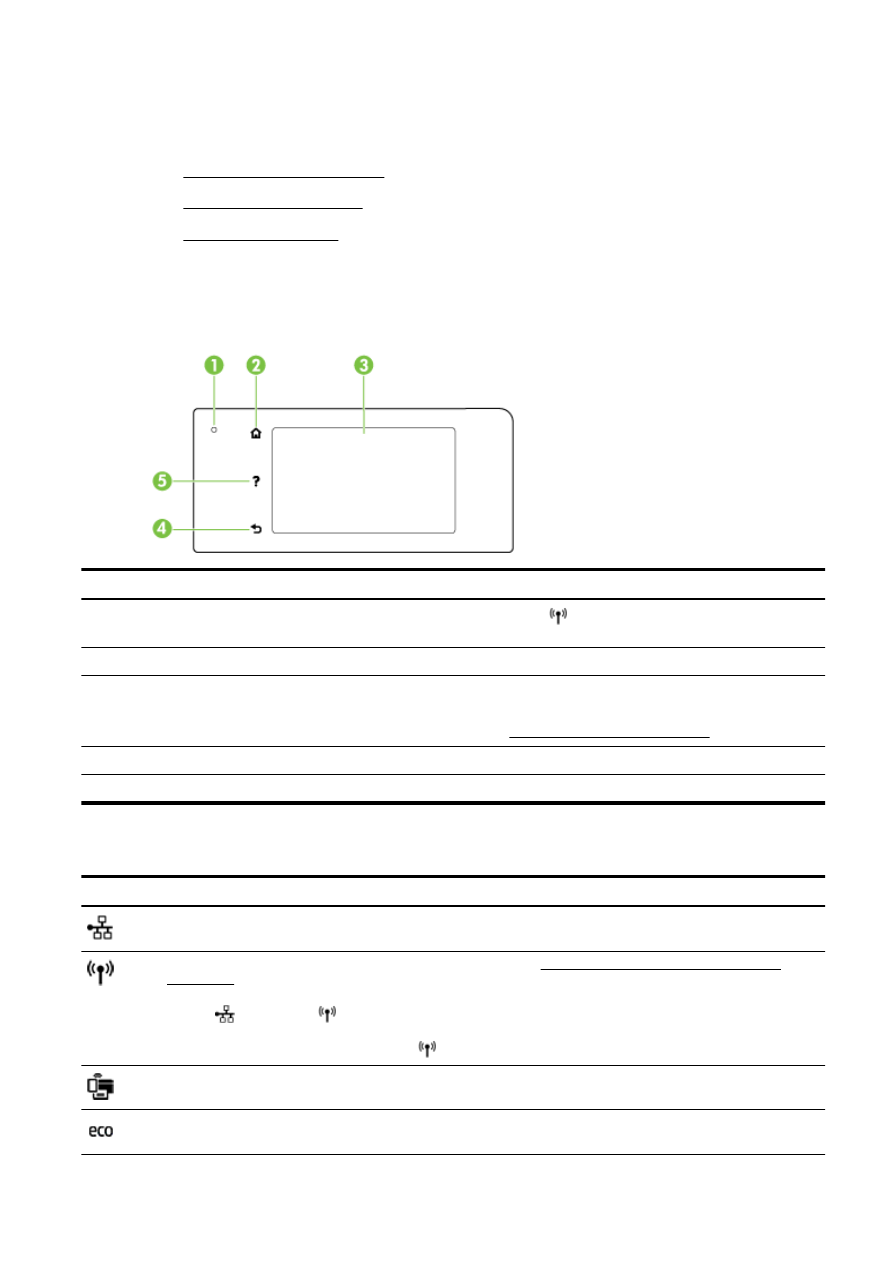
Overview of buttons and lights
The following diagram and related table provides a quick reference to the printer control panel
features.
Label
Name and Description
1
Wireless status light: Blue light indicates a wireless connection. Touch
(Wireless) to turn on or off the printer wireless
capabilities.
2
Home button: Returns to the home screen from any other screen.
3
Control panel display: Touch the screen to select menu options. For addition menu options, touch and slide your finger
across the screen.
For information about the icons that appear on the display, see Control panel display icons on page 9.
4
Back button: Returns to the previous menu.
5
Help button: Opens the Help menu.
Control panel display icons
Icon
Purpose
Shows that a wired network connection exists and also provides easy access to the network status screen.
Displays wireless status and menu options. For more information, see Set up the printer for wireless communication
on page 106.
NOTE:
(Ethernet) and
(Wireless) do not display at the same time. Showing the Ethernet icon or the wireless icon
depends on the way your printer is connected to network. If the network connection of the printer has not been set up, by
default, the printer control panel display shows
(Wireless).
Turn on (with and without security) or off wireless direct. If turning on wireless direct with security, then you can also
display the wireless direct name and security password.
Displays a screen where you can configure the product power saving settings features.
ENWW
Use the printer control panel
9
Icon
Purpose
Touch the icon to display the Web Services Settings where you can view the printer's email address and make ePrint
settings.
For more information, see HP ePrint on page 91.
Displays a screen where you can make copies or select other options.
Displays a screen where you can send a fax, or choose fax settings.
Displays a screen where you can make a scan, or change scan settings.
Displays a screen where you can use print apps.
Displays the Setup screen for generating reports, changing fax and other maintenance settings, and accessing the Help
screen.
Provides more information about the printer features.
Displays a screen where you can see information about the ink cartridges, including fill levels. This icon has a red border
when an ink cartridge needs attention.
NOTE: Ink level warnings and indicators provide estimates for planning purposes only. When you receive a low-ink
warning message, consider having a replacement cartridge available to avoid possible printing delays. You do not need to
replace cartridges until prompted to do so.
Displays the status of the Auto Answer function. Touch Auto Answer to turn it on or off. For more information, see Set the
answer mode (Auto answer) on page 77.